Disclosure: Guess what? Otters eat over 10 pounds of sashimi a day! To help offset the cost of food (and running this website), we receive a commission if you click on a link and purchase something.
Going “paper-free” is a personal or professional goal for many. It means to transition from paper as a mode of storing information in favor of digital resources.
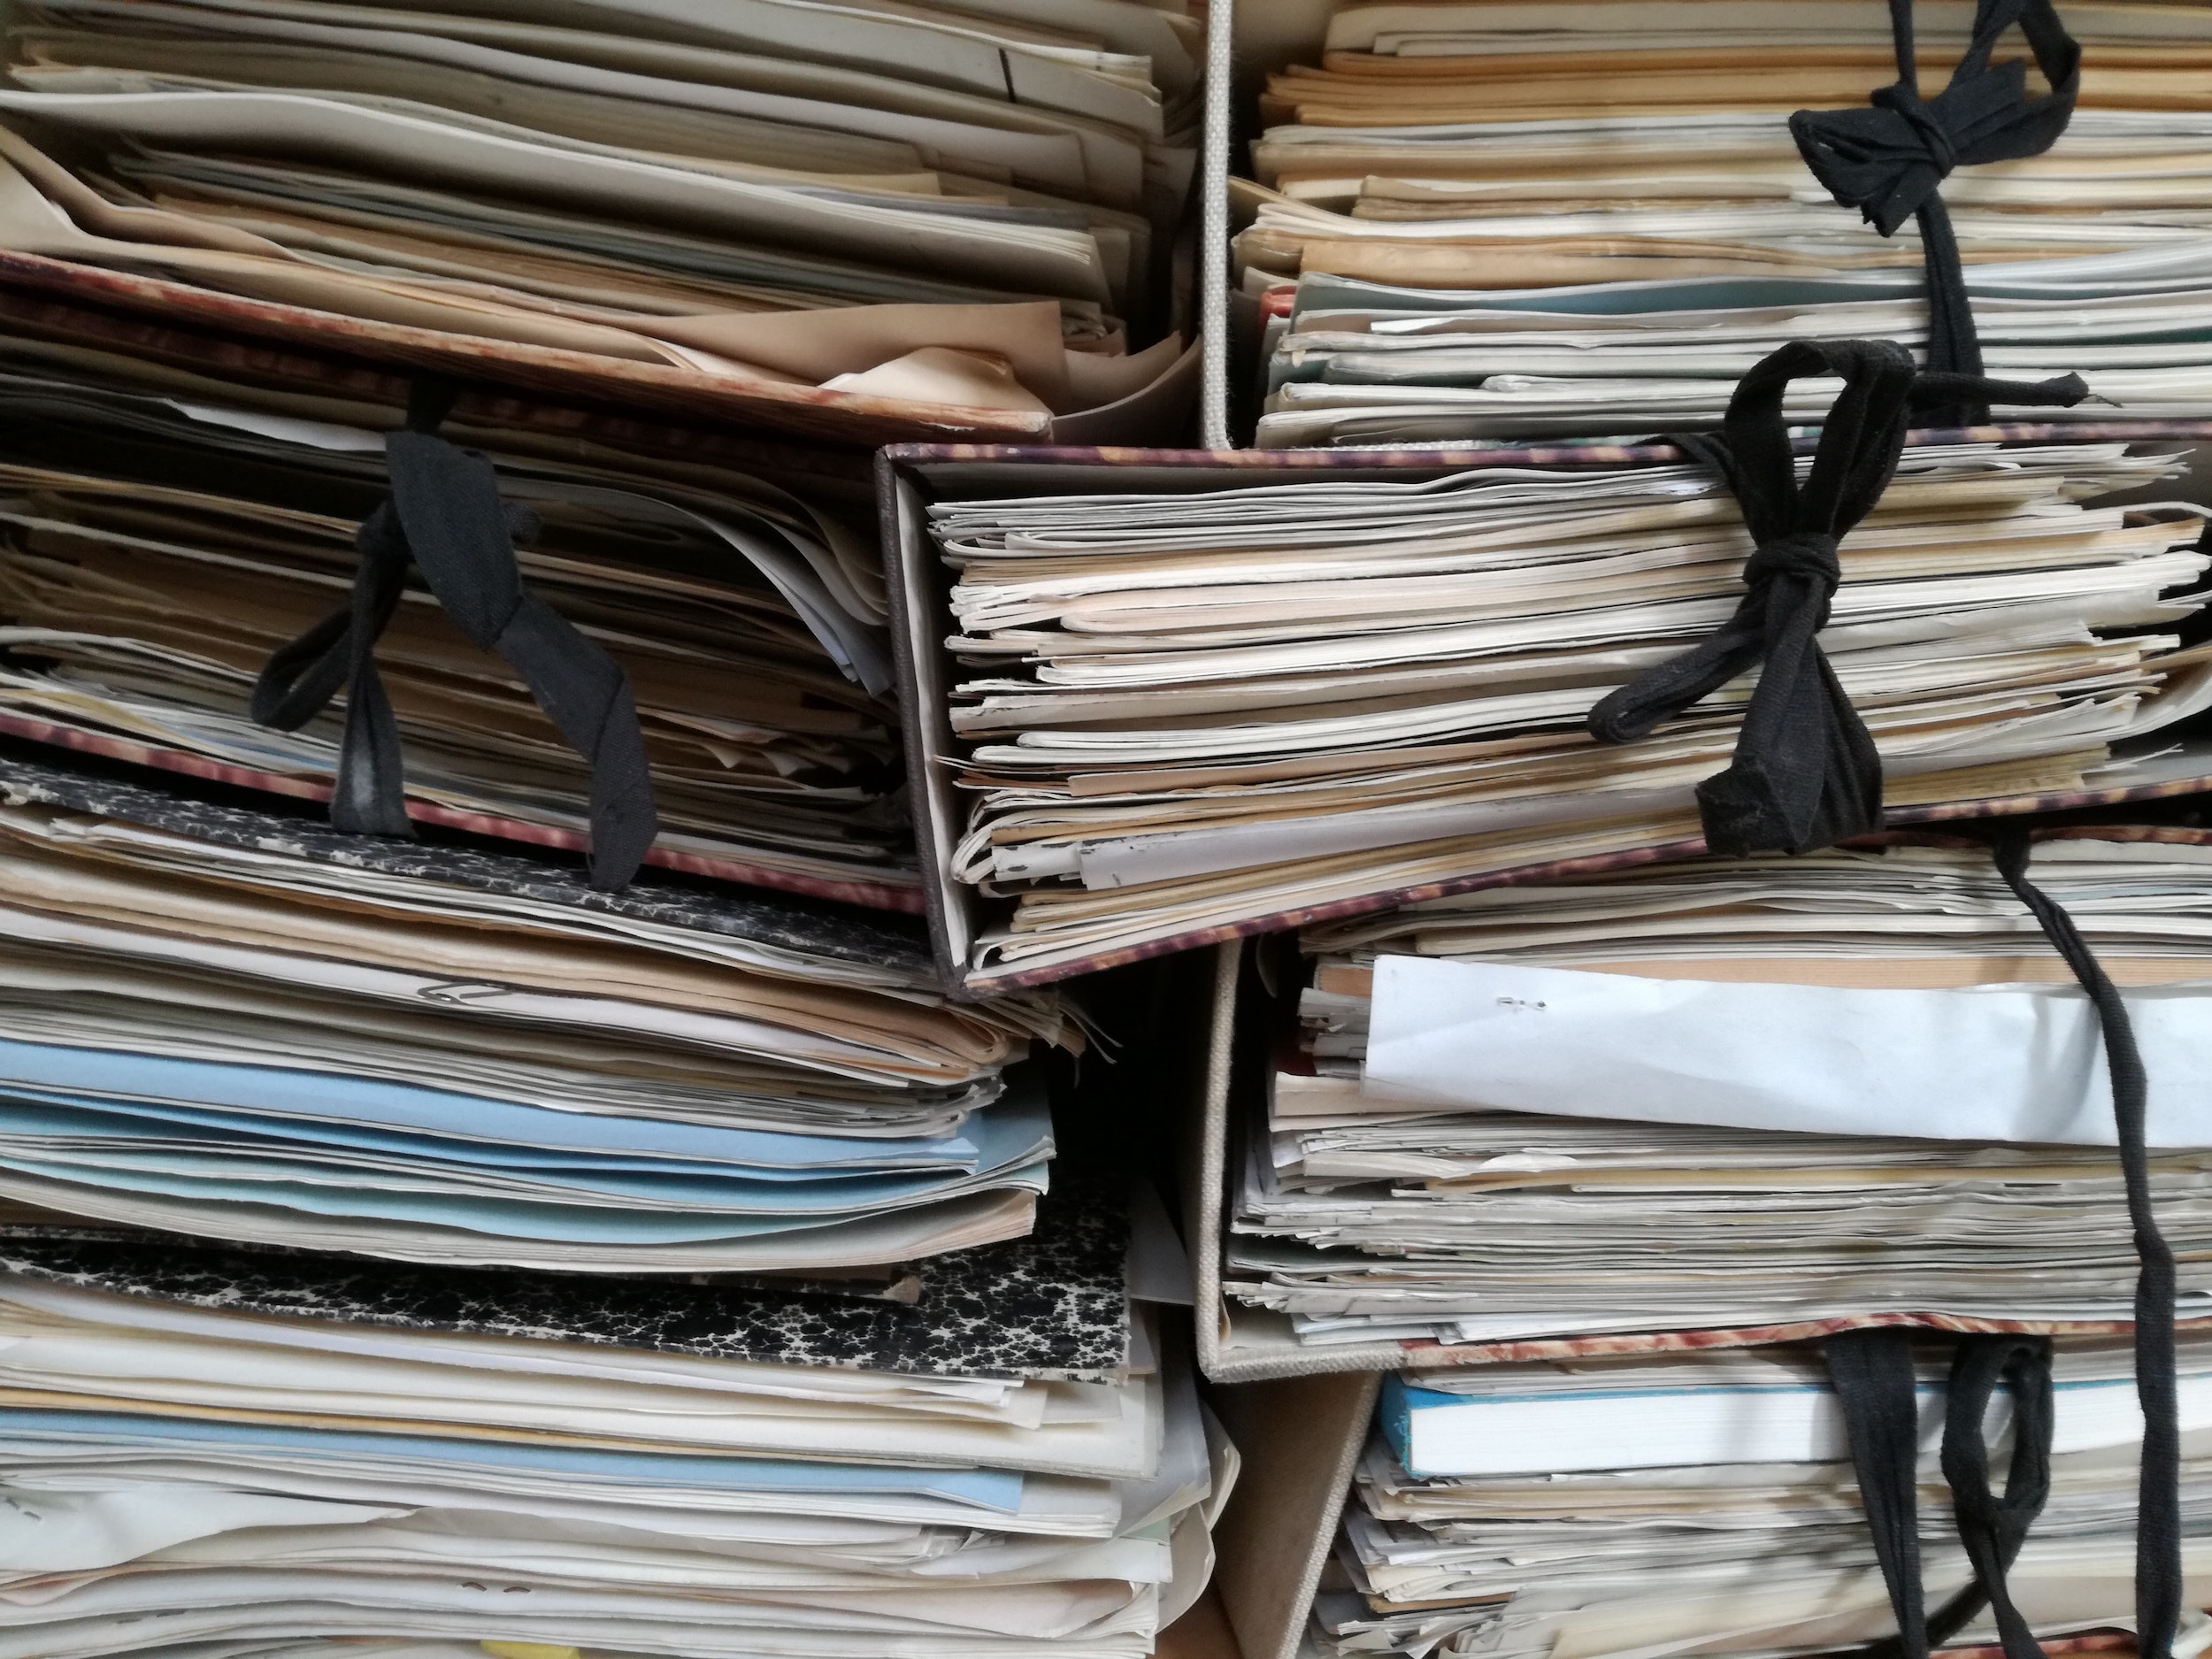
There are many reasons for wanting to go paper-free, such as less clutter, saving physical space, concerns for the environment, or a minimalist aesthetic. What ever your reason, clearing out filing cabinets may mean scanning and saving files to keep a digital version.
When deciding to go paper-free, you may find yourself with a few questions:
Does everything need to be scanned and turned into a digital file?
Is there anything I need to save a paper copy of?
If I scan everything, how do I avoid “digital clutter”?
This article will address what to keep in paper form, what can get digitized, and considerations of digital clutter.
It may seem a bit counter-intuitive to suggest keeping paper in an article about going “paper-free”. But the truth is, there are some things you will want to keep a hard copy for your records, for safekeeping, or because current systems do not allow digital versions of the document in question.
Documents you should keep in paper version are called “Permanent Documents”. Permanent documents have at least one of the following criteria:
Irreplaceable or difficult/costly to replace
Items with ink signatures or stamps that will not be transactionally accepted digitally
Sealed documents (such as transcripts)
Documents that may need to be accessed by someone else at your time of death or in case of an emergency
For example, you may be asked to present a copy of your marriage license when applying for a mortgage. If you have a stamped copy (depending on your state or country), keeping this document will save you a trip to your county courthouse – and any associated fees!
Another example of a permanent document may be a last will and testament. While you or your lawyer may have a digital copy of this document, having the latest copy printed in your filing cabinet can be helpful for your survivors.
Finally, have a small packet of items in a fire/flood safe box that gives you the information in case of an emergency. Digital versions are great, but it can also be helpful to have insurance policy numbers, agent contact information, and passports in a place that is easy to grab if you have to leave your home immediately.
Examples of permanent documents:
Title of a home or automobile
Certificate or an educational degree
Sealed transcript from higher ed institution
Bond / Loan certificates
Licenses
Birth certificates and social security cards
Wills or trust documents
Important Documents for Digital Filing
The next question to ask yourself when going paper-free is, “what documents should I scan and save as a digital file?”
Some people prefer to scan and save everything in case it is ever needed. Others wish to reserve digital space and avoid digital clutter. What you choose to save is up to you, but here are some items we highly recommend saving as a digital backup.
Financial Documents
While you probably won’t need to save your receipt for donuts from three years ago (unless you are deducting it!) there are certain financial documents you should hang on to.
Keeping a copy of contracts is a no-brainer. Having digital versions can be helpful in locating the information you need quickly. These documents will be great to have on hand:
Employee tax documents (W-4s, yearly W-2s, or 1099s)
Employment contracts and job descriptions (the latter is an informal contract of services)
Rental agreements and leases
Contracts for services: lawyers, builders, developers, contractors of any type
Legal filings and agreements
Policies and Warrantees
Insurance companies may keep a copy of your policy on their website – just log in and download! But make sure you download the latest version (and disregard a previous version unless making a claim during that time period).
Why keep a copy? Because you never know when their portal may change, or worse, the policy changes from the one you signed up for!
Additionally, keeping a scanned copy of warrantee information from products you own can be helpful if you ever need to make a claim against it. Create a digital file for a product warrantee, including any instructions or manuals if available, and add details about the product – such as when and where you purchased.
Medical Records
Health care in the United States is not centralized or universally accessible. Coverage and providers may change based on location or employer. Therefore, we recommend keeping a digital copy of all medical records. This may include:
Prescription information, Rx #, drug interaction/symptoms information
Test results and lab work
Doctor’s orders and any recommendations from appointments
Scans, x-rays, and other important information pertaining to your health
Medical record numbers, health insurance information, and provider information
Be Wary of Digital Clutter
Once you have scanned and filed the important stuff, it is time to take a hard look at what might not be so important after all, and how this can contribute to digital clutter.
Digital clutter is just like paper clutter, but on a computer, hard drive, or cloud system. It may seem innocuous at first, but too many unnecessary files have drawbacks. They may become difficult or complicated to organize. Or, even if well organized, old files take up space. It may mean buying a second, or larger hard drive. Or spending more money for more space in a cloud-based system.
Truthfully, just because you CAN save a file digitally, doesn’t mean you should. Here are some examples of files that can simply be skipped into recycling:
Old insurance policies that are no longer effective and no claim was made during the time of the policy
Receipts for products you no longer own or cannot return
Bills or statements to utilities from months or years past (the most recent version will do)
Brochures, catalogs, and mailer advertisements (record the information you need and dump it)
Outdated versions of documents for work
Scrap paper and notes if already recorded somewhere else
Anything else can be scanned, saved, or recycled at your own discretion. Enjoy the paper-free lifestyle!
This article will walk through what “paper-free” means, and how to achieve it in your own home.
Disclosure: Guess what? Otters eat over 10 pounds of sashimi a day! To help offset the cost of food (and running this website), we receive a commission if you click on a link and purchase something.
What is “Paper-Free”?
Paper-free is the concept that a workspace can be free of paper and rely on digital documents and processes. Paper-free is also aesthetic – no more filing cabinets, printing hard copies for records, or saving old documents in a physical space. It is a means of opening up space and getting rid of clutter. Technology supports searching and accessing important information from anywhere, at any time.
For many, going paperless is a stance to protect the environment by reducing the consumption of paper products and the subsequent processes of recycling or trash collecting.
What it isn’t
Going paperless in your home or workspace does not mean you will never interact with paper products again. It is the reality that paper is a major medium for communication. You will still receive paper in the mail. You will sometimes need to print and sign important documents.
Being paper-free isn’t about having no shred of paper in your home. It is about reducing your dependency on paper and finding digital alternatives to access information.
Tools You’ll Need
Before embarking on your paper-free journey, you’ll want a few tools to get you started:
A Computer
You don’t need a dedicated computer for scanning, but you will want a place to start uploading files. If you have a laptop, it will provide you the flexibility to scan and import documents from anywhere!
A Scanner
There are a lot of scanners on the market. Some integrate with note-taking apps, making your import process easier. Others allow you to scan multiple pages, or front and back, with the push of one button. This can save you time by making the process somewhat hands-free.
There are also scanners that are bluetooth, portable, or extra small. It is important that you find one that fits your needs. For example, if you have a lot of 8.5″x11″ multi-page documents you may want a feeder instead of a flatbed scanner.
This isn’t required, but very helpful. If you are scanning documents and saving as PDFs, you can keep them on your computer in the folders your computer likely has already.
However, there are many benefits to having a note app or cloud-based software:
Access your documents from any device at any time
Digital backups mean no worries about lost information if your computer dies
Ability to tag and search documents
Scalability – you can add more documents than you may have space for on your computer
Ability to collaborate on documents with family or team members
Here are some so software options we recommend checking out:
This is the go-to for Office Otter, and holds a special place in our heart. Evernote has a robust list of features and provides a great way to organize documents.
The most impressive feature is its ability to scan and read PDFs – making it easier for you to search for the content you need!
A top contender, especially for PC users, is OneNote. This application comes standard on any Microsoft Office package. Arguably, it has more features than Evernote with its ability to act as a digital notebook in both function and form.
Draw, highlight, add tabs or chapters – this application is great for tablet users. Plus, OneNote can be backed-up with the Microsoft OneDrive cloud system.
If you have a Google / Gmail account, you have access to Google Drive. This is the online file database with a limited amount of free storage each month.
This is a great option if you are also looking for software to create documents. Integrates with Google Docs, Sheets, and Slides.
A big hitter in the cloud-storage market, Dropbox has been around for years. With their tight security measures and massive server capacity, Dropbox has become an enterprise icon for businesses looking to support remote employees.
Depending on the plan you sign up for, this may also be the most expensive option.
Bins or cardboard boxes
You will want to sort your paper workflow as you go. Having a few bins or cardboard boxes can be helpful. This doesn’t need to be fancy – and we don’t recommend going out and buying bins specifically for this purpose.
The Process
Step 1: Create Physical Station
The first step for going paper-free is to create a station or system for processing paper in your environment. This means having a place to put paper that needs to be processed, and then paper that has already been processed.
Where to set up this station
We recommend placing your station in a workspace, near your desk or a table. Having it visible during your regular activities reminds you to work through paper processing.
The process of scanning papers can take months, depending on how much time you have to dedicate each week. Therefore, we do not recommend converting your living room into a station unless you don’t have much paper to process.
Setting the station up in a way that majorly disrupts your life will leave you feeling frustrated and overwhelmed.
Have “bins” for storing your various stages of paper.
Inbox – The paper that hasn’t yet been sorted at all. If you have many boxes, bins, and file cabinets, your inbox bin will be a place to put 1 stack, drawer, or box at a time.
File – A set of items or papers that you definitely want to keep. This may include birth certificates, social security cards, marriage licenses, college degrees, etc. If you are unsure what to keep, put documents in this bin and then go through again at the end of the process. You may find you’ve changed your mind on some things!
Shred – Papers you’ve processed that has personal or sensitive information that you should shred for your protection before disposing of.
Recycle – Papers you’ve processed that can be recycled. Includes items already shredded.
Trash – Anything that cannot be recycled.
Step 2: Sorting Papers
This is the activity of going paper-free. You will be taking items and papers from your inbox, and processing through the various steps of scanning and to bins.
When you take an item out of the inbox bin, make a choice of where it needs to go. Ask yourself the following questions, in order, moving down the list:
Do I need a digital copy of this document/file?
Do I need to keep a paper copy of this document?
Do I need to shred this document?
Can I recycle this paper?
Tips for sorting papers:
Don’t try to sort and process all your papers at once. Work in batches. This will leave you with space and a feeling of accomplishment!
Immediately process paperwork from inbox. Don’t create additional processing steps (like “to scan” or “to have partner look at”). This creates more time and work for each document and is a form of procrastination.
Understand that not everything needs to be scanned. There is such thing as digital clutter. The more you scan the more digital files you will need to organize.
Step 3: Scanning Papers
This step isn’t very exciting. We highly recommend setting up a temporary scanning station in front of a Netflix enabled device.
Keep all papers for a single document in the same file. Separate files for each separate document.
Scan all your documents to a single folder (SCANNED FOLDER) you can sort through when you are done scanning.
If your scanner app allows you to name the file you are scanning at the time of the scan – do it! It will make sorting easier. Make sure to use the same naming convention for all your files.
Scan in batches. Either choose a single pile or bin, or just what you can finish during a movie. Don’t overwhelm yourself.
When you are done scanning a document, decide where it needs to go next (filed away again, shredded, or recycled) and move to the appropriate bin.
Step 4: Digitally Organize
Open the folder or notebook where all your scans are saved. The SCANNED FOLDER, mentioned above.
One by one, rename the file (if not previously named in Step 3), and then move it to the folder or notebook that is appropriate. Continue until your SCANNED FOLDER is empty.
We recommend doing this step in batches as well. At some point, you may find you need a change of pace from scanning or shredding. This is another activity that can be done on a laptop in front of Netflix.
Tips for digital organization:
Don’t skip this step. It is much harder to find what you are looking for if your document is named “scan_00_043829.pdf”.
You may come across a document that doesn’t fit into any of the folders or notebooks you originally set up. It is okay to add new ones!
It is easier to remember how to name a document, and what it is, after you just scanned it. Integrating this process with scanning will make it less daunting at the end.
If more than one person needs access to documents, grant access in your document storage as appropriate.
Step 5: Physically Organize
Once you have scanned your whole life into a digital platform (yay!) you will likely find that there are still some papers you can’t part with. These will be the items you put in your “to file” pile.
This pile may include movie ticket stubs from a first date, child’s artwork, or important documents like a birth certificate.
Only you can decide what you should keep. However, if you find you are adding a lot of things back into the “to file” pile while sorting, go back through after you have finished processing all your other paperwork. Treat this pile like an inbox and make the decision again whether to keep or recycle. You may find that some things aren’t as important the second time around. Or, you may find that your child’s artwork can be scanned and treasured as a desktop background for years to come without the need to take up space in your cabinet.
Take time to physically organize the remaining items. If it is sentimental, add it to a box and label it “Memories” so you can go through it from time to time. For things like marriage licenses and birth certificates, we recommend putting them in a fire box so they are secure in case of an emergency. Copies of insurance policies and contracts can be saved in a small filing box.
Maintenance of Paper-Free
Don’t be discouraged when you realize that the stream of paper doesn’t seem to end. You will still get the mail or have contracts to sign. Paper is a major medium for communication in our society.
Here are some ways to maintain a paper-free space:
Keep a small inbox on your desk to collect all the things that need to be scanned and sorted. Continue the process above daily or weekly and you will find it stays manageable.
Recycle or trash junk mail immediately before adding important mail to your inbox.
Don’t accept brochures or business cards. Instead, take a photo of the information you need, and hand it back!
Choose paper-free billing. Some companies will offer you a discount if you opt-in to paper-free billing for credit cards or utilities. Instead of receiving a bill in the mail, you will get a statement or reminder emailed to you!
This article provides instructions on how to import documents into Evernote. This can be helpful as a way to use Evernote as a document manager and keep everything in one place.
Disclosure: Guess what? Otters eat over 10 pounds of sashimi a day! To help offset the cost of food (and running this website), we receive a commission if you click on a link and purchase something.
You can do more than just take notes with Evernote. Evernote has the capacity to be a document manager, as well. Add files to an existing note to annotate, tag, or sort for reference later.
There are three ways to add files to Evernote:
Add an attachment
Scan to Evernote directly
Take a Photo with Evernote Phone App
Add An Attachment
This option is for importing a file that already exists on your computer.
Open Evernote in a browser, or on your desktop.
Create a note and add a note title.
Add attachment using the paperclip icon for a document, or the shutter icon for a photo or image.
Select the document you want to upload.
Important Notes:
Multiple attachments can be added to a single note.
Document Files, spreadsheets, and presentations will display as a bar and name (screenshot).
PDF documents can be viewed in full.
Both formats can be downloaded at a later time to a different computer.
Scan To Evernote
This process requires you have the Evernote desktop version downloaded on your computer. It also requires a scanner.
Scanning to Evernote is useful for converting paper files into digital PDF documents and uploading to Evernote without saving a copy on your computer.
Open your scanner software on your computer.
In the “Scan To” option, find and select the Evernote Desktop Application
Scan the item with the settings needed for your scan.
Items will automatically be added to your default notebook.
For more detailed instructions based on software and scanner brand, see the following:
Epson - Document Manager
Open the Document Capture software installed when you set up your Epson scanner.
Make sure your Epson scanner is turned on and connected to your computer either hardwired or Bluetooth enabled.
Select the “Manage Job” icon (paper with gear), or select Manage Job from the Scan navigation menu.
Create a job function on the pop-up window. This will allow you to create individual settings for different scans, such as single-page text scans, or multi-page color and high-resolution scans.
In “Destination” select Evernote, and the notebook you want scans to be added to.
Save the job – and start scanning!
Take a Photo with the Evernote Phone App
You can add documents and images to Evernote using your phone. This feature allows you to add to an existing note, or create a new note.
Add to an existing note
Open the app
Choose the note you want to add the document or photo to
Place your cursor in the location of the note you wish to add the attachment
Tap the Camera icon at the top.
If you are taking an image photo, tap the screen for the shutter button to appear and tap the button to take a photo.
If you are capturing a document, place the document on a contrasting background and line up with the guides in the app. The app will take the photo automatically when aligned correctly. Continue taking photos to add to the collection. Tap the green checkbox when done capturing.
Create a new note
Android: tap the Add icon and options will appear above. Select the camera.
iPhone: tap and hold the Add icon for options. Select the camera.
Take photos of the the document or image you wish to capture. Tap the checkmark when done.
Label the note.
To attach an existing file from your phone, follow one of the steps above (add to existing note or create a new note) and instead of tapping the camera icon, tap the paper-clip icon to add an attachment.
Searching for a new job is stressful. You might send out 100 resumes before you find the perfect job. Make it easier on yourself by keeping your applications in order and easy to find. Did you know you can track job applications in Evernote?
If you haven’t heard of Evernote or thought it was only a note-taking app, it is time to brush up on what this tool can do. In this article, we will cover how to keep track of all the job applications you have submitted during your job search.
Disclosure: Guess what? Otters eat over 10 pounds of sashimi a day! To help offset the cost of food (and running this website), we receive a commission if you click on a link and purchase something.
Benefits of Using Evernote
Online access means your job search can happen anywhere
Everything is in one place – no need to open many files
Search for job keywords to find past applications
Track the status of a job application
Check if you’ve applied to a company before and if so, which job.
Quick Note
You will need an Evernote account to use the following tutorial.
The following steps will help you get set up to start tracking.
Create a Job Notebook
Your first step will be to create a notebook for all your job applications. Title this notebook “Job Applications” and add any letter or numbering system, if you use one.
Don’t create a stack or separate notebooks for each company or job type. Keep it simple and use Evernote’s powerful search function.
For every job you apply to, use the same template. This will make it easier as you move forward to know exactly what you sent and what is a part of each job.
Title your template “Job Application Template” and save it in your “Job Applications” notebook. Create a shortcut to this note so you can use it over and over.
Keep a clean (empty) template and don’t copy from a job application note that you have previously filled out. Why?
If you re-use (copy from) a job template that already has content from another job, you may accidentally forget to remove old information.
It would be tragic to follow up with a hiring manager that never posted the job in question because you forgot to remove their contact information in the new note.
That won’t be you, though. Because you now have a template you can use.
Job Tracker Template
Quickly check the status of your job applications and never forget to follow up again!
Evernote Plus, Pro, or Business User? Create a template and avoid the problem altogether!
How to Use the Job Application Tracker Template
The template may seem super simple, but that is the point. It is important not to over complicate and allow you to get right to the point.
Fill in the details
Find a job you want to apply for? Copy the job description, title, date the job closes and other details into your tracker. Don’t rely on the job link. Job postings get removed and expire. The link may not work by the time the hiring manager starts reaching out to people for interviews. This is especially important when preparing for interviews.
This process is, after all, a job application tracker. Add your applications!
Evernote makes a simple note a multimedia opportunity. If you created a custom resume for the job, and you should, you can attach it into the note.
Attach your resume and cover letter so you know what you presented to the company.
Attach your completed application. If an online application allows you to “print” a version at the end, print it to a PDF or image file and attach it here. This will help you if you get a callback. Plus, it never hurts to have more information.
Set application status
This is an important part of the process, as it lets you know where each application left off. You won’t wonder: “Did I follow up on this one already or was that the other project manager position?”
Keep adding to the “Status” section.
The trick to success is to make the status quick to read and easy to understand. Always include a date for the last time you did anything with the job application.
For example:
04.15.2018 – Submitted Job Application and Resume
This tells you that on April 15th you applied for the job. More importantly, it tells you that you haven’t done anything with that job since.
Let’s say the job application closed on April 30th and it is now May 7th. If you haven’t heard anything, it might be time to reach out and follow up – let them know you are still interested in the job. After you do this, you would add another line that says as much.
04.15.2018 – Submitted Job Application and Resume 05.07.2018 – Sent email to the hiring manager to saying I’m still interested(See attached)
If the hiring manager responds, you can include anything important then.
04.15.2018 – Submitted Job Application and Resume 05.07.2018 – Sent email to the hiring manager to saying I’m still interested (See attached) 05.10.2018 – Hiring Manager said they will start interviews by the end of the month and to follow up then.
Track job applications in Evernote until the final status reads one of the following:
Recently I found myself sitting in my car, waiting for a tow truck after having been rear-ended on a highway. For those of you unfamiliar with the process, calling a tow truck bestows upon you the gift of time.
My adrenaline was starting to dissipate and with my head clearing up from the accident I realized I need to start recording everything. I had exchange information with the other driver, and taken photos. Now I needed to recall the events before I forgot anything.
Using Evernote for Everything
I pulled out my phone and opened the Evernote App (my go-to for note taking). I opened a new note and stared at the blank screen. Where do I start? What do I record? How do I link all the information I have from photos to contact info?
Eventually I bumbled my way through it, but in times of crisis, it is helpful to have a guide. What if I hadn’t remembered to document the location of the accident and now the other driver and I have conflicting reports? What if I forgot to get the insurance information of the other driver, or their phone number?
Disclosure: Guess what? Otters eat over 10 pounds of sashimi a day! To help offset the cost of food (and running this website), we receive a commission if you click on a link and purchase something.
Auto Accident Report Template
The result of that accident is an Evernote Template for Auto Accident Reports. I developed this template to help other Evernote users avoid the situation I was in. This report is to help you identify what you need to know and document. It is your tool to account for the events of an accident.
Safety First
Address injuries and move vehicles to a save location before filling out this report.
The key here is to download it now so you won’t have to worry about it if the time ever comes.
Save the template to your Evernote Account. For those with the Plus, Premium, or Business license of Evernote, you can save a template for quick select. For those using Evernote’s free version, duplicate the note each time to need a fresh copy.
By saving as a template, you don’t have to search for it. If you find yourself in an accident, simply open a new note and select “Templates”.
Quick selecting a template in Evernote on a mobile device.
Here is what the Accident Reporting Template includes:
Location of the accident
Weather and Road conditions
Description of the accident from your point of view
Damage sustained to vehicles
Contact information of any other drivers
Police contact information in the accident jurisdiction
Personal injury of all passengers and parties
Insurance claims and area to continue follow up on reporting and claims
We never want an accident to happen, and so the unplanned nature means we can get caught off-guard if they do occur. While this template won’t prevent an accident, it can help you mitigate the fall out.
Accident Report
Use this Evernote template to record details and easily make accurate claims.
How do you organize recipes you find online? From low-fat vegan health blogs to southern comfort food, you can find a recipe for anything. Combine the love of cooking with the potential for a career in cooking and you get a plethora of online food blogs.
This makes it easy when you are searching for a new recipe to bring to your favorite holiday party. Looks delicious? Bookmark it!
Except, how do you find it again on your phone when you are in the grocery store trying to buy ingredients?
Let’s say you are on Pinterest and see a recipe that looks great for the summer and want to save it for later. But who are you kidding? Your Pinterest board (Food!) has thousands of pins. Good luck finding that one again!
The question isn’t ‘where do I find recipes?’. The question is, ‘how do I save and manage all the recipes I find?’.
This article will help you organize recipes using Evernote. At the end of this walkthrough you will be able to:
Easily search and find any recipe you’ve saved
Edit recipes so they fit your taste or ingredients
Add your own photos so you know what the recipe really looks like
Create meal plans from your recipes
Disclosure: Guess what? Otters eat over 10 pounds of sashimi a day! To help offset the cost of food (and running this website), we receive a commission if you click on a link and purchase something.
Start by setting up two notebooks: Inbox and Recipes.
The first notebook is your Inbox notebook. An Inbox notebook is your dumping ground of notes before being processed. Exactly like a physical or email inbox, actually.
We will use the Inbox notebook as a way to test recipes before adding them to the Recipes notebook. Then you know which recipes you haven’t tried yet.
The second notebook should be your Recipes notebook. This will be where you put all the recipes you’ve tried, liked, and want to use again.
This walkthrough will use Evernote for Desktop, but you can also use Evernote in your browser.
Find a recipe you want to try. If you are using Pinterest, be sure to open the recipe to the webpage where the content lives.
The kind of deliciousness you might find on a recipe blog.
Using your Web Clipper tool, save the recipe to your Inbox notebook.
Drop down of the web clipper tool in Dark Mode
Select the notebook where you want it to go (Inbox) and select Article. You will see a green outline of the area that will be clipped. By selecting “Article” instead of “Full Screen”, web clipper won’t capture all the banner ads on a site.
Side Note
The Web Clipper tool has this fantastic feature where you can set it to “Smart Filing”. This means it guesses where the bookmark should live based on the content. You can override this feature in settings, or by manually selecting a notebook.
Now let’s take a look at what ended up in our Inbox.
Cleaning Up Notes
The content in the main body of the article will be in the note. A link back to the original blog post is at the top so you won’t forget where you found the recipe.
At the time of this writing, this link is only seen on the desktop version, not in the web version of Evernote.
Also included in this note are all the photos, the author’s description, and even some in-line ads.
I recommend deleting extraneous photos and resizing text so the note is easier to read.
Now you have a nice and tidy recipe note you can reference in the future.
Nice and tidy!
Using and Editing Recipes
If this note is for “sometime in the future” it may live in your Inbox for a while. But, if you want to try the recipe soon, set a reminder to use the recipe.
Step One:
Step Two:
Now comes the fun part – making the recipe!
Like most recipes, you may find that you need to make alterations. Because Evernote is the ultimate note-taking tool, it is meant for just this purpose.
You can make notes as you cook, or go back later and make suggestions for the next time you make the recipe.
Types of notes to include:
Substitutions for ingredients that you use
Extra steps to help make a recipe clearer Removing instructions you find misleading or unnecessary for your preferences
Instructions on when to serve or what plates you like to serve it on
Versions of the recipe (for example, a spicier version for her, or more mild version for him)
Notes about cooking this recipe in tandem with another recipe (such as a side dish).
Once you’ve tried a recipe, it is time to make a decision.
Should you save the recipe for later?
Do you see yourself making this recipe again? Was the recipe tasty? Could you edit the recipe to make it better?
If you answered “Yes” to any of the above questions, it is time to move it into your Recipes notebook.
At the top of the note, click on the Inbox notebook. From here, you can move this note to another notebook.
You can repeat the above process to organize recipes from all your favorite blogs. Clip, edit, and save to your Recipes notebook.
Creating Meal Plans
Meal planning is easy with your Recipes notebook. It is like having a cookbook with only your favorite, tested, recipes!
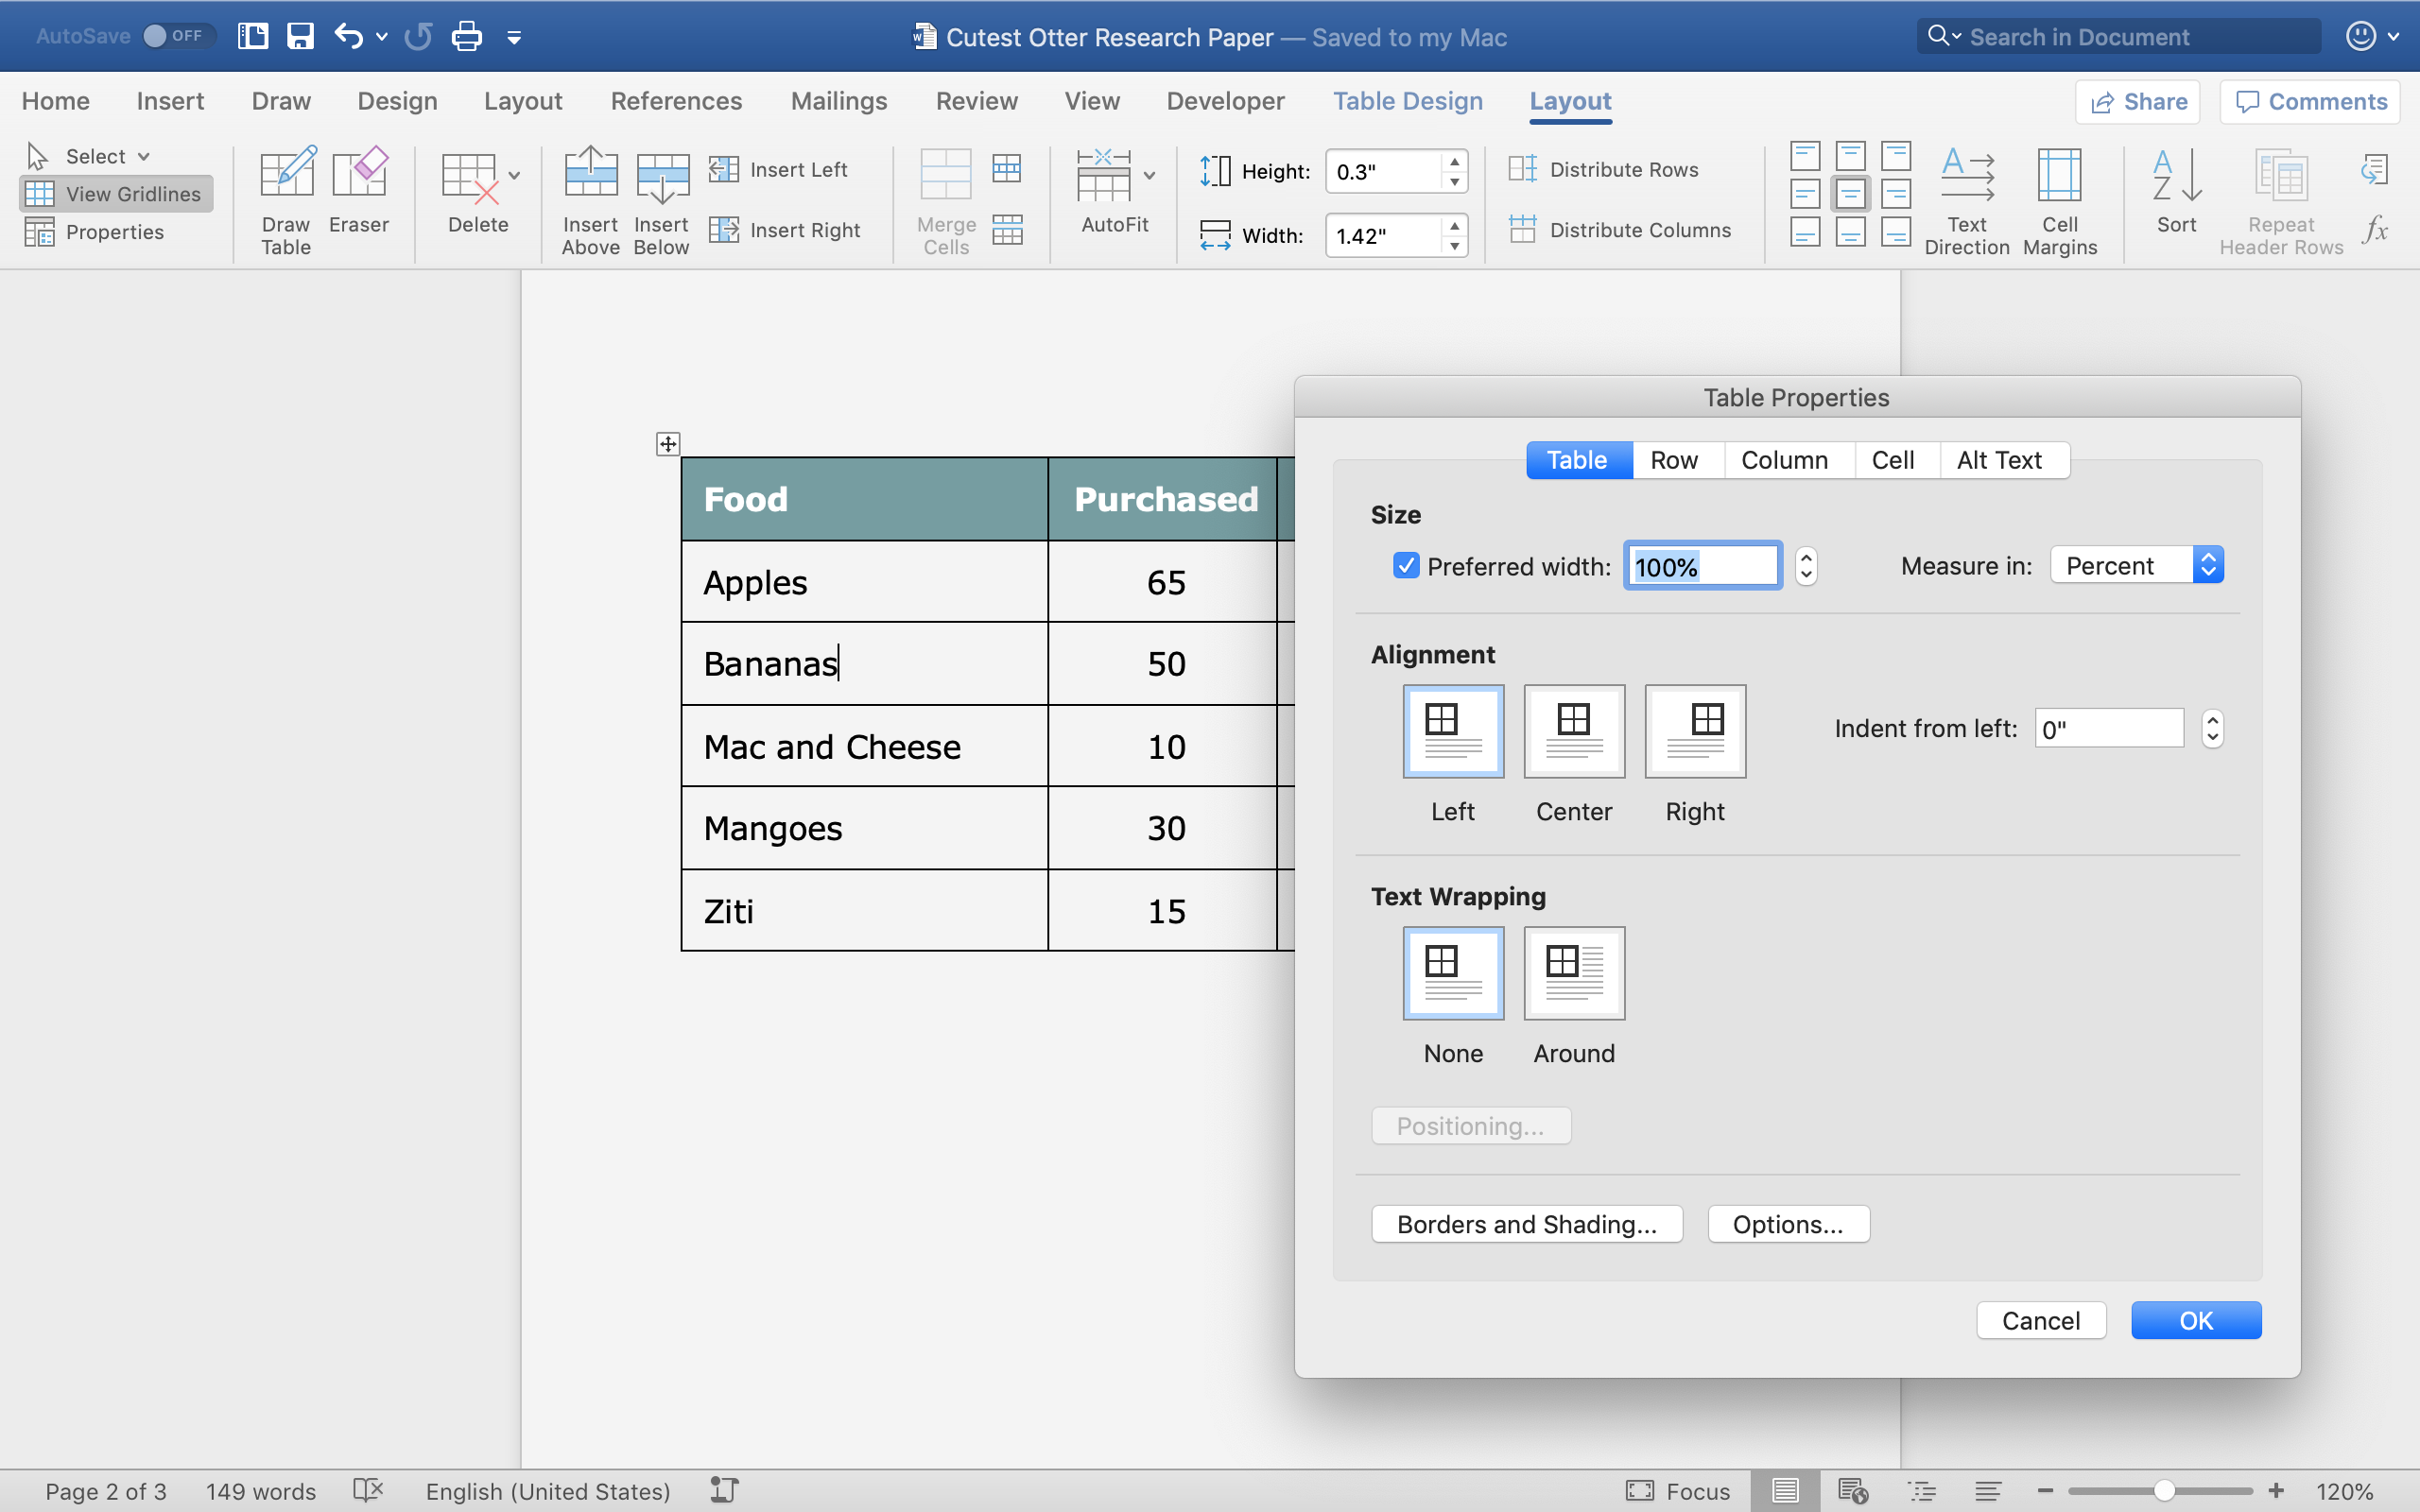
Go to your Recipes notebook and create a Meal Planner note. Don’t reinvent the wheel – Office Otter has a Meal Planner template you can use for free! Download and add it to your Recipes notebook.
Meal Planner
Save your recipes each week with this Evernote template.
You can change up the days of the week in the left column so they start on any day that works for you.
If you plan snacks or eat 4-6 small meals, add columns by clicking on the (+) icon between columns.
When you have the Meal Planner grid set up, save the note as a template so you can create it over and over each week.
Open the Meal Planner note in another tab within Evernote. Then you can switch between your meal plan and your recipes.
To open another tab, click right-click (Mac: 2-finger click) on the meal plan note and select ‘Open Note in New Tab’.
Start adding recipes to your meal planner. Search your Recipes notebook and find a recipe you want to add to the meal plan.
Right click on the recipe note in the note list and select “Copy Note Link” In the Meal Planner note, place your cursor in the cell you want to include the recipe. Right-click and select “Paste” or Ctrl+V (Mac: Command+V). This will paste both the link and the name of the note (recipe name).
This is how to add a link to another note in Evernote.
In the end, your meal plan should look like this:
Grocery List
Once you have the week planned, add ingredients from each recipe to the Shopping List.
Combine any duplicate ingredients to get your grocery list for the week.
Cross-reference your grocery list with what you have on hand.
And there you have it! An organized recipe book you can use over and over and an easy way to produce a meal plan for the week or month.
Disclosure: Guess what? Otters eat over 10 pounds of sashimi a day! To help offset the cost of food (and running this website), we receive a commission if you click on a link and purchase something.
The Business of Education is an institution designed to challenge students to develop learning techniques and time management skills as much as it serves to impart quality education.
Many have found themselves drowning from school work even if they possess a firm understanding of course material.
This shouldn’t be the case.
Learning techniques, time management, and organizational skills can be learned. Or, borrowed from. That is where Office Otter is here to help.
The following information will explain the different sections of the template and how to best use it.
Note Title
Make finding your note easy by using this title system:
Instructor Contact Information
Add this to the top of the document so it is easily accessible. This information should be provided in your syllabus.
Don’t forget to include office hours!
Syllabus
Upload the syllabus and attach it to this note.
A syllabus is a contract between you and the expectations of the class.
Additionally, a good syllabus will include important learning objectives and a reading list. These two things are very helpful, not just during class but to have in your records afterward. It will help you reference what you learned when you are applying for jobs.
Some professors are weird about protecting their syllabus. It comes down to wanting to protect their intellectual property in the field of academia. Be respectful of how you use their materials and don’t sell it or pass it off as your own course. However, don’t be dissuaded from keeping the information for your own records – if you paid tuition that knowledge is yours.
Homework and Projects
This is where you list all the things you need to do for the class. This includes homework, projects, and even studying for a test.
Use the checkbox feature in Evernote so you know what you’ve completed. Plus, it provides a very satisfying “Check” once you’ve completed or turned in the assignment.
Want to make sure you don’t forget an assignment? Create a reminder on this note and an alarm to check back before the due date.
Lecture Notes
Under this section, simply start each lecture with a date and proceed with notes in whatever format you prefer (bullets, highlighting, etc.) Include questions you have in red text and highlight anything you believe may be on an exam.
If your professor is generous enough to provide the slides to a lecture, download them and add them to this note.
Pro Tip
Want to save a slide during a lecture? Take a photo with Evernote’s camera feature on the app and attach it to the lecture notes.
Finally – if you are the nice “let’s all be better students and share learning” type (yay!), you’ll be interested to know that you can share your lecture notes with other students.
Simply click the share icon and you can send as an Evernote note, as an email, or even as a link on your social media.
We all have things we need to keep track of. Whether it be important conversations, or tracking our exercise, we benefit from recording important information.
Bullet journals are great, but what about the stuff you want to track over a long period of time? Something you reference quickly?
This article covers four types of records you need to keep, and how to use a style of note taking called the Diary Note.
A diary note is simply a singular note that I keep adding to with dated entries. This is in contrast to separate notes on the same general topic.
Benefits of a Diary Note
I don’t have to search through multiple notes to piece together information
I can read a history of information easily and track a story
It lets me know where I left off on a project or conversation
I can use it to link to additional content and provide context to other notes
Now that we’ve established what a diary note is, here are four examples of how to use it (IRL).
Disclosure: Guess what? Otters eat over 10 pounds of sashimi a day! To help offset the cost of food (and running this website), we receive a commission if you click on a link and purchase something.
You are so excited because you just signed up for Advanced Aerospace Engineering!
The class is notoriously difficult and the last thing you want is to drop any balls while you are balancing the rest of your course load of Symbolic Dance of Native Cultures, Post-Modern Scottish Literature from 1943-1952, and Russian.
To keep everything organized, create a note and title it with the name of the course, course number, and quarter/semester you are taking the class.
Advanced Aerospace Engineering – AERO 445 – Spring 2019
Include the following information:
Class Schedule
Copy of the Syllabus
List of all homework and projects/tasks
List of exam dates and expected material
Lecture Notes
Notes Template
Keep your lecture notes and class assignments in one place with this Evernote template.
It doesn’t matter how great of a relationship you have with your landlord – this is a CYA protocol. You never know when something might go south and the “we’ll get to those repairs” turns into 6 months of deferred maintenance and you have to file a legal complaint.
Having detailed records goes a long way toward helping your position as a tenant.
Here’s how to track these conversations:
Start each entry with a date and topic or subject line
Write a description of the interaction. Include the name(s) of those you spoke with and all details you can remember. Especially include any conclusion or decision made.
Include a link to any supportive documentations, like an email or maintenance request receipt.
This note type can be used for any important communications, such as with debt collectors, lawyers, accountants, or important and repeat customer service.
Health Records
Many health care delivery systems and HMOs have complete health records for individuals.
If you live in a country without single-payer insurance programs (like the United States) you may find yourself with disjointed health records.
A health record note is one way to keep a lifelong diary of your health. It provides you with a helpful overview of your medical history. That can be helpful for your doctors as well!
Follow the same instructions as above for logging descriptions and dates. Include copies of prescriptions and links to notes with doctors.
Hiking (or tracking exercise)
Like millions of other individuals around the globe, I enjoy outdoor recreation from time to time.
My Hiking Diary note will be a list of all the hikes I’ve accomplished.
I create a new entry (same note) as such:
Date – Trail/Park Name – Miles Covered
Description should include the following:
Route taken (trail head started/ended and any changes in trails)
Start time and end time of the hike
Elevation gained or lost
Conditions of the trail (muddy, washed out, crowded, closed in parts)
Wildlife spotted
Opinions of trail and whether you would return or recommend
I also upload maps of trails to Evernote and link to them from the diary – creating an easy reference to where I’ve trekked.
And now you know how to create a diary note and how it is a great tool in Evernote.
Disclosure: Guess what? Otters eat over 10 pounds of sashimi a day! To help offset the cost of food (and running this website), we receive a commission if you click on a link and purchase something.
Having a place for your financial transaction documents is an important part of staying organized. Scanning transactional paperwork can often be the last, and most challenging, part of going paper free.
Transactions are any of the following:
Receipts
Bills
Statements (different from bills, they simply report the status of something – like investments)
Tax Documents (W2, 1090, etc.)
Paystubs or checks (anything that is money to you)
Contracts (promises to pay, IOUs, financial agreements)
Some people would prefer not to have this information digital, and instead keep records on hand in paper form. But what if, god forbid, there was a fire or flood? Wouldn’t it be nice to have a backup copy?
For others, going truly paper free is the goal and that is what this article is here to help you do.
Advantages to uploading Financial Documents
Paper free! No more piles of mailed bills you already pay online. A clutter-free desk! Rediscovered storage space!
Easy, searchable, access to all your important financial documents.
Preservation of receipts – the carbon fades! Trust me, it is embarrassing to hand your tax accountant a stack of blank paper rectangles.
The ability to cross-reference a note to another note. Such as, linking a business receipt to budget spreadsheet.
Add comments to a document such as “paid on 4/10” or “pending account review” to keep track of the status of the bill or statement.
Forward note to company, accountant, or partner via email as necessary.
If you weren’t on-board before, maybe you are thinking, “Interesting – tell me more”. If you landed here because you are on the Evernote, paper free, organize my life, highway, you are probably thinking, “Let’s do this!”
If you plan to use one category more than others (say, receipts), you can force the receipts notebook to the top of the list by leading the notebook name with a number. Otherwise, the list of notebooks in the Finances stack will be alphabetical.
Use an Inbox
Going paper-free is great, but it is work that is never done. You will regularly have bills, statements, and receipts that you need to process. Even if you have receipts sent to you via email, you will still want to store that receipt in your centralized system.
That is what an Inbox helps you with. It is a centralized dumping ground for all the notes you haven’t yet processed and filed into the correct note.
Likewise, you may already have a collection of financial documents uploaded to Evernote. For this next step, move them into your Inbox. This way, you can keep track of processing your financial documents.
Title Notes Systematically
Here is the gold: it is all about how you title your note. This will make your receipt, bill, statement, etc. easier to find in the future. It will also help you sort your notes.
Title all financial related documents with this structure:
Date in this format: YYYYMMDD
Type of document
Bill
Contract
Paystub (or Check)
Receipt
Statement
Taxes
Name of establishment or business conducted
Amount in transaction (skip for some statements and tax documents)
If you have receipts for home, and receipts for business, you may want to specify “Biz” or the name of the business in the title. This way you can easily search and filter at a later time. If you collect many business receipts or separate transactions, it may be a good idea to create a separate notebook for those documents.
Once you have titled a note accurately, leave any important comments in the body of the note to help you remember what the transaction is for or if any action is necessary.
If you need to follow up on a note, be sure to use the Reminder feature in Evernote to receive follow up notifications.
Finally, move the note from your Inbox into the appropriately specified notebook. All done!
Do you use Evernote? Have a different system? Share your ideas in the comments below.
You’ve heard of Evernote before – maybe you have even used it casually in the past to take some notes. But you are now ready to actually use Evernote to its fullest potential. Because I can tell you right now, Evernote isn’t just a note taking app.
At base, Evernote is a series of notes stacked together with a few different search features (notebooks, search, and tags), the utility of these functions is entirely dependent on how you organize Evernote notebooks.
This article will cover how to organize your Evernote notebooks so that you can make the most of the program.
When you are done with this process, you will feel so organized and productive and ready to take on the world! Everything will fit into its perfect place and that will make you unstoppable.
Disclosure: Guess what? Otters eat over 10 pounds of sashimi a day! To help offset the cost of food (and running this website), we receive a commission if you click on a link and purchase something.
While you can perform many of these functions on your phone or a tablet, I highly recommend downloading Evernote to your desktop/laptop for these steps. It will be a lot easier for this set up.
No Tags – Just Notebooks
For this process, I’ll be walking you through how to set up your Evernote account using Notebooks and Stacks. If you are new to Evernote, this is how to set up Notebooks and Stacks.
You can follow along with these instructions by opening your Evernote desktop application and creating notebooks along with this post. At the end, you will be on your way to a better, more organized life!
!Inbox – The Foundation
I can’t take credit for inventing this trick, but I have seen it repeated a lot among Evernote Community because the functionality of an inbox is so powerful. I learned about this from Stacey Harmon, an Evernote genius, who has found a way to use Evernote to literally power her life.
An Inbox is simply a notebook with all the notes you haven’t yet processed, filed, and/or tagged. They may be notes without proper titles or unfinished thoughts. They may be notes that are sent to Evernote via your email inbox or a bookmark you pinned from the Evernote Web Extension.
Your Notebook Layout will look similar to this when you are done reading this post!
The word “Inbox” says it all. It is the first spot dumping ground for you to sort through.
Then, anytime you jot something down it will show up there for you to review later. You will regularly go through your Inbox, just like you do with email, to find something you haven’t finished yet.
If you have been using Evernote for awhile and are looking to reorganize existing notes, move all your notes into !Inbox to sort later with this new organizational system.
.System – A Reference
The next notebook you should create is a reference notebook. This notebook will include notes that specify how to organize Evernote notebooks.
You are going to love your organizational system – until 6 months from now when you get your tax return and you can’t remember if you were planning on filing that under “finance” or “business”?
This is how .System helps. It is a quick reference notebook with notes that help you remember your own filing system.
Create three notes in this notebook:
Notebook Categories
How To Title Notes
Evernote Tips
The Notebook Categories note will be a bulleted list of all your notebooks and stacks with a description of what goes into each notebook.
Pro Tip
Follow along with this article and fill in this note as you go!
The How To Title Notes note provides instructions for processing notes before filing. I find this helpful for financial or transactional notes.
Finally, Evernote Tips. As you become more familiar with Evernote, you will start learning new tips and tricks that help you become a better user. Evernote is more powerful than it first seems. Use this note to keep track of all the Evernote tips that are interesting to you.
You can start by creating link to this article for easy reference!
1. Finances
Now we get into the numbered notebooks in your organization. This is the location of all your financial documents, which includes the following:
Receipts
Bills
Statements
Tax Documents
Paystubs
Contracts
In this category you have two options:
Option A: Create a stack of financial notebooks
Option B: Create a singular financial notebook and rely on the title to specify the financial note item.
Choose option A of you are uploading most if not all of your financial documents and/or you have hundreds of financial documents you need to sort through.
If you choose option A, create notebooks for all the above categories and then join them together in a stack.
Choose option B if you are only using Evernote for a couple categories (such as Receipts for your business and the occasional statement) and you don’t need to sort through all the notes at a more granular level.
If you choose option B, you will want to make sure you follow the Title and Tag process carefully so that you can easily search your notes.
You don’t have to use Evernote at work in order to include a notebook with work-related items. For each job you have had, or currently have, create a notebook. In each notebook, create/upload notes for the following items:
Resume you used to get the job
Job description with specific dates and location of employment and manager contact information
Performance reviews
Projects, documents, and emails you are proud of (portfolio)
Job Tracker Template
Quickly check the status of your job applications and never forget to follow up again!
I don’t actually use this set up for work, since I use Evernote for my business. I have a stack for each business (see Work A and Work B in notebook image above).
If you use Evernote for work, or use Evernote business, this section may look different for you, too.
Let me know in the comments below if you are interested in an article on how to set up Evernote for your business (or how to use the ‘Evernote for Business’ product).
3. School
If you are in school, Evernote will serve as a great tool for you for many years to come.
I recommend you create new note for each class you are taking, and treat the note like a diary of events and lecture notes. As additional projects are added, link to them from your main class note.
If you are no longer in school, but you have documents you want to save from school, create this notebook but give it a number lower down on the list.
4. Health
This notebook is a great way to easily reference your health history, experience at a doctor’s visit, details on your prescriptions, and more.
I have a singular note for each family member in my household that contains an ongoing diary of health history.
If you have regular prescriptions or a preexisting condition you need to track, it might be helpful to create a note specifically for each issue to track separately.
A diary note is a great way to include all information in one location. Here is an example:
Add to your diary by linking to additional notes in this notebook. This cross linking will make it easier for you to reference additional materials.
Using the example above, let’s say you want to include the specific prescription you received so you know what type of antibiotics you were prescribed.
Take a photo of the prescription bottle or prescription note using your Evernote App camera function.
Add the photo note to your Health notebook
While viewing the note on your phone, tap Share (or three dots on Android) and tap Copy (Internal) Link.
When writing your health diary, paste the link in text. The title of the note will be the link text.
Besides doctor’s appointments and prescriptions, this notebook is a great place to include an exercise routines, vaccination records, mental health information, or gym membership information.
Health insurance statements and medical bills will be categorized under “Financial”.
5. Home
This stack is incredibly helpful for anyone as it serves to collect all reference materials for your home.
If you plan on using Evernote to go paper-free, you will be surprised by how much we accumulate that we never look at but can’t bare parting with.
Conversations with your landlord (link to diary note post)
Homeowners/renters insurance documentation
Inventory of household items for insurance purposes
Note with reminders to change filters, or a list of all the sizes and power of lightbulbs you use in different lamps and overhead lighting
Manuals & Warranty
Scan in all the manuals and warranties for everything. Evernote Premium can search PDFs, making this a scan and done task. If you are using Evernote Basic, be sure to title the note with the name of the product.
This comes in handy: I ran out to my local hardware store to get a replacement filter, but forgot to write down the filter size. Quick search for my product manual and there it was!
Don’t want to bother scanning everything? You can find most manuals on line with a quick Google search. Add a link to the manual next to the name of a product in a note.
Recipes
Find a recipe online you want to try? Bookmark it with the Evernote app and it will add it to your !Inbox. Tried it and liked it? Move the note to this folder for repeat use. Or, move and then edit to include any changes to the recipe.
Also great for scanning in Grandma’s Secret Recipe so it never gets lost.
Maintenance receipts, title, warrantee information, and anything else you need to keep your baby running in tip-top shape.
Lawn & Garden
Can’t remember where you planted tulip bulbs last year? Create a yard map and writing in what you planted and where. Also, any instructions on plant care or vegetable growing calendars.
Have someone else manage your yard? Scan maintenance paperwork so you remember the last time fertilizer was added or irrigation was tested.
6. Important Documents
This notebook may seem kind of silly – aren’t these all important documents?
This location is for all the important documents that you don’t want to lose but don’t warrant their own notebook. Examples include:
Marriage licenses
Birth certificates
Immigration documentation and/or Visas
Contracts and NDAs that don’t fit anywhere else
Last will and testament
Court paperwork
Certificates, Awards, and Degrees
Credit Reports
Voter Information
7. Collectables
Think of this notebook as your digital scrapbook. You probably have a shoebox full of these things already. Or an actual scrapbook. But part of going digital and ditching paper is preserving these memories in another form.
Ticket stubs, love letters, postcards from your traveling aunt – this are all the types of things that make it into the collectables folder. Scan, title diligently, add your thoughts and feelings to the note, and save forever!
Besides memorabilia, use Evernote as a “commonplace book”. A commonplace book was a type of journal people used to carry around with them that would include quotes, poems, recipes, equations – basically any bit of information people didn’t want to lose. More thoughts on a commonplace book by Evernote.
A thought on photos…
Photos are collectable, and something that most paper-free people move to digital. But – and this is hard for me to say – I don’t think you should use Evernote to manage your photos.
While Evernote can certainly work to store your photos – the whole point of photos is to look at them!
8. Hobbies
If you have a lot of involved hobbies, you can certainly create separate notebooks for each and then combine them into a stack to keep it tidy.
Here are some examples of hobbies and the types of notes you might want to create:
Boating
There is a surprising amount of paperwork that goes with boating.
Certifications (swimming, sailing)
Permits
Manuals for boat maintenance
Role Playing Games
Character sheets (create templates you can fill in and use on your favorite device!)
Maps and dungeon information
Links to favorite or upcoming campaigns
Knitting or Crochet
Use web clipper to create links to new patterns
Uploads and scans of your favorite patters
Gift List – a “who gets what” of your annual creations
Reading
Note with a list of books you want to read
Add it to your shortcuts list so you can easily pull it up when someone gives you a recommendation
Note with a list of books you DID/HAVE read and when you finished them.
Great if you have a reading goal and to look back
Book reviews that you write
Hiking
Maps – upload them online to save space and then make a map available offline for when you go outside of your data range.
Keep a hiking diary so you know which trails you hit and how long it took. Also great to note whether you saw any wildlife and the weather conditions.
The sky is the limit when it comes to tracking hobbies!
9. Business Cards
The Evernote app has a cool feature where you can use your phone camera to take a picture of a business card. It will then add that contact to your contacts list as well as connect with them on LinkedIn (premium feature).
Then, Evernote keeps a copy in this folder.
When I’m handed a business card, I take a photo right away and set a reminder to connect with that contact on whatever it was we spoke about.
Oh, and then I hand the card back – because, you know, paper-free. 🙂
10. Templates
At some point in your life with Evernote, you will find you create a repeat style of note. Maybe it is a recipe note, maybe it is a weekly task list. After creating the note a few times you will realize that a template is what you need.
If you have plus, premium, or business-level Evernote accounts, you can right-click a note and save as template.
Note
This is a new feature as of 2019. Previously, all Evernote users had to copy existing notes.
For those with free accounts, copy a note into your Templates notebook and remove all body content you don’t want to replicate (basically, create a fresh version).
When you are ready to use the template, copy your clean “template-version” into the notebook you want it to go and fill in.
11. Notes
I admit, the title of this notebook is a bit on the nose. However, this is your catch all. The place where you put reference notes to something that doesn’t fit into any of the categories above.
Our lives are not neat and tidy (as much as we would like them to be). Inevitably, there will be something that falls outside of the realm above.
That is what this spot is for.
Simply make sure the title and text are descriptive enough that you can search for it at a later time.
If the note is something you need to act on, however, it should live in !Inbox so you don’t forget it. Or, set a reminder.
And that is how to organize Evernote notebooks. With all your notebooks and stacks laid out, you have all you need to be organized in this digital world.
This website uses cookies to improve your experience. We'll assume you're ok with this, but you can opt-out if you wish.AcceptDeclineRead More
Privacy & Cookies Policy
Privacy Overview
This website uses cookies to improve your experience while you navigate through the website. Out of these, the cookies that are categorized as necessary are stored on your browser as they are essential for the working of basic functionalities of the website. We also use third-party cookies that help us analyze and understand how you use this website. These cookies will be stored in your browser only with your consent. You also have the option to opt-out of these cookies. But opting out of some of these cookies may affect your browsing experience.
Necessary cookies are absolutely essential for the website to function properly. This category only includes cookies that ensures basic functionalities and security features of the website. These cookies do not store any personal information.
Any cookies that may not be particularly necessary for the website to function and is used specifically to collect user personal data via analytics, ads, other embedded contents are termed as non-necessary cookies. It is mandatory to procure user consent prior to running these cookies on your website.